


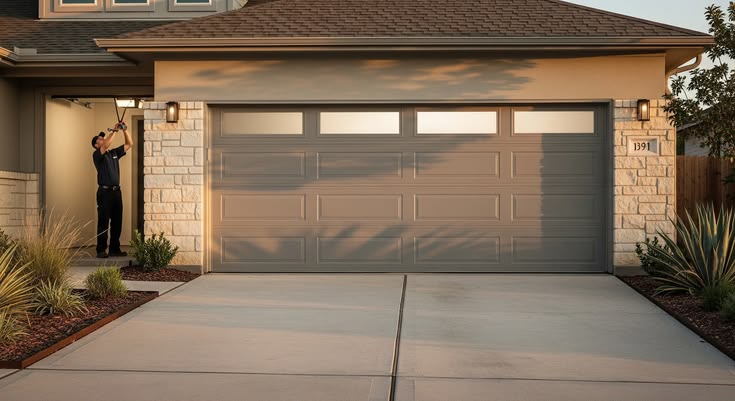
How to Install a Garage Door Threshold Seal to Block Water and Pests
A garage is often one of the most vulnerable areas of a home when it comes to water intrusion, dirt, insects, and small pests. Even if your garage door is in excellent condition, small gaps between the bottom of the door and the garage floor can allow rainwater, leaves, dust, rodents, and insects to enter. One of the most effective solutions is installing a garage door threshold seal.
A threshold seal creates a raised barrier on the garage floor that works with the bottom seal of the garage door to form a tighter, more weather-resistant closure. This simple upgrade can significantly improve the cleanliness, comfort, and protection of your garage.
This guide explains how to garage door repair Chandler AZ threshold seal properly to block water and pests while extending the life of your garage.
What Is a Garage Door Threshold Seal?
A garage door threshold seal is a durable strip made from rubber, vinyl, or similar weather-resistant material that is attached directly to the garage floor beneath the garage door.
When the door closes, the bottom seal presses against the threshold, creating a tight barrier that helps prevent unwanted intrusion.
Main Functions of a Threshold Seal
- Blocks rainwater and surface runoff
- Prevents dust and debris from entering
- Deters insects and rodents
- Improves weather sealing
- Enhances energy efficiency
- Protects stored items from moisture
Threshold seals are especially useful in areas that experience heavy rainfall, snow, or frequent pest problems.
Benefits of Installing a Threshold Seal
Adding a threshold seal is a relatively inexpensive project that offers numerous advantages.
Improved Water Protection
Heavy rain can easily seep under a garage door if the floor is uneven or the bottom seal has worn out.
A threshold seal helps redirect water away from the garage interior.
Pest Prevention
Small openings beneath a garage door often serve as entry points for:
- Ants
- Spiders
- Crickets
- Mice
- Rats
- Other small pests
A properly installed threshold reduces these access points.
Better Energy Efficiency
The seal minimizes drafts and helps maintain more stable temperatures inside the garage.
Cleaner Garage Interior
Dust, leaves, dirt, and debris are less likely to enter when a threshold seal is installed.
Tools and Materials Needed
Before beginning the installation, gather the necessary supplies.
Tools
- Tape measure
- Utility knife
- Caulking gun
- Broom
- Wire brush
- Marker or pencil
- Safety gloves
Materials
- Garage door threshold seal kit
- Construction adhesive recommended by the manufacturer
- Concrete cleaner or degreaser
- Clean rags
Always use adhesive specifically approved for garage floor applications.
Step 1: Measure the Garage Door Opening
Accurate measurements are essential for proper installation.
Measuring Procedure
- Measure the width of the garage door opening.
- Confirm the threshold seal matches the opening width.
- If necessary, mark the seal for trimming.
Many threshold seals can be cut to size using a sharp utility knife.
Step 2: Clean the Installation Area Thoroughly
The adhesive bond depends heavily on surface preparation.
Cleaning Process
- Sweep away dirt and debris.
- Remove dust using a broom or vacuum.
- Scrub oil stains or grease spots.
- Use a degreaser if necessary.
- Allow the floor to dry completely.
A clean surface ensures maximum adhesive strength and long-term durability.
Step 3: Test Fit the Threshold Seal
Before applying adhesive, place the threshold seal in position.
Check for Proper Alignment
Verify that:
- The seal spans the entire garage opening.
- The door will close directly over the seal.
- The seal sits flat on the floor.
- There are no obstructions.
Making adjustments now is much easier than after adhesive is applied.
Step 4: Mark the Installation Position
Once the placement is confirmed:
- Use a marker or pencil to outline both sides of the seal.
- Create guide lines on the garage floor.
- Remove the seal.
These reference marks help ensure accurate placement during final installation.
Step 5: Apply the Adhesive
Most threshold seal kits include recommended adhesive instructions.
Application Method
- Turn the threshold seal upside down.
- Apply adhesive in continuous beads along the underside.
- Follow the adhesive manufacturer’s coverage recommendations.
Avoid gaps in the adhesive to ensure a secure bond.
Step 6: Position the Threshold Seal
Carefully place the threshold seal onto the marked location.
Installation Tips
- Align it precisely with the guide marks.
- Press firmly along the entire length.
- Ensure the seal sits evenly against the floor.
- Avoid twisting or stretching the material.
Proper positioning is essential for effective sealing.
Step 7: Apply Pressure Along the Entire Seal
Firm pressure helps the adhesive bond correctly.
Recommended Methods
- Walk carefully along the seal.
- Press manually along its length.
- Use a roller if available.
Pay special attention to the ends and corners.
Step 8: Remove Excess Adhesive
As pressure is applied, excess adhesive may squeeze out.
Cleanup Procedure
- Wipe away excess material immediately.
- Use a clean rag.
- Follow adhesive manufacturer recommendations for cleanup products.
Removing excess adhesive creates a cleaner, more professional appearance.
Step 9: Allow Proper Curing Time
Adhesive must fully cure before the garage door is used regularly.
Typical Curing Times
Most adhesives require:
- 12 to 24 hours before light use
- Up to 48 hours for full strength
Always follow the manufacturer’s instructions.
During curing:
- Keep the garage door open if possible.
- Avoid driving vehicles over the seal.
- Prevent moisture exposure.
Step 10: Test the Seal
After curing is complete:
- Close the garage door.
- Inspect the contact between the bottom seal and threshold.
- Check for visible gaps.
- Open and close the door several times.
The door should operate smoothly without excessive resistance.
Tips for Maximum Water Protection
To further improve water resistance:
Inspect the Bottom Door Seal
The threshold seal works best when paired with a properly functioning bottom weather seal.
Replace worn or cracked bottom seals as needed.
Address Floor Slope Issues
Significant floor drainage problems may require additional corrective measures.
Maintain Drainage Around the Garage
Ensure water is directed away from the garage through:
- Proper grading
- Functional gutters
- Downspout extensions
Common Installation Mistakes to Avoid
Inadequate Surface Cleaning
Dust, dirt, and oil can weaken adhesive bonds.
Misaligned Placement
A poorly positioned threshold may prevent proper sealing.
Using the Wrong Adhesive
Always use products approved for threshold seal installation.
Insufficient Cure Time
Premature use can compromise adhesive performance.
Maintaining Your Threshold Seal
Routine maintenance helps extend the seal’s lifespan.
Regular Inspection
Look for:
- Cracks
- Separation from the floor
- Wear from vehicle traffic
- Adhesive failure
Cleaning
Periodically remove:
- Dirt buildup
- Leaves
- Mud
- Debris
A clean seal performs more effectively.
When to Replace a Threshold Seal
Most high-quality threshold seals last many years, but replacement may be necessary if you notice:
- Visible damage
- Loss of flexibility
- Persistent water intrusion
- Separation from the floor
- Excessive wear
Prompt replacement helps maintain garage protection.
Additional Benefits Beyond Water and Pest Control
Many homeowners install threshold seals primarily for water protection but later discover additional advantages.
These include:
- Reduced wind-blown debris
- Better insulation performance
- Lower humidity levels
- Cleaner storage areas
- Improved garage appearance
A threshold seal often becomes one of the most cost-effective garage upgrades available.
Conclusion
Installing a garage door threshold seal is a simple yet highly effective way to block water, pests, dirt, and drafts from entering your garage. With proper preparation, careful placement, and quality materials, most homeowners can complete this project in just a few hours. The result is a cleaner, drier, and more protected garage that remains more comfortable and functional throughout the year. By combining a threshold seal with regular maintenance and proper weather sealing, you can significantly enhance the performance and longevity of your garage door system.
